Where’s that WordPress Setting? 3 Hidden Options
by Jason Unger, Founder
Insights / Website Development /

To steal a turn of phrase, WordPress is the most complicated content management system to use … except for all of the other ones.
We always tell clients who are switching to WordPress that if they know how to use Microsoft Office, then they’ll be able to use WordPress.
WordPress gives us (the designers and developers) all the flexibility we need to build the best, most optimized websites for our partners, while ensuring that it’s easy for users of all technical levels to do what they need to do.
Of course, we always get questions about doing certain tasks – and they tend to repeat.
Here’s 3 common questions we’re often asked about a WordPress setting or function.
Text Formats: Hidden Behind the Toolbar Toggle
The traditional WordPress editor is a WYSIWYG editor (What You See Is What You Get), meaning that what you type into the editor is what you can actually expect to see on your website.
That applies to spacing, formatting, image sizing, and more.
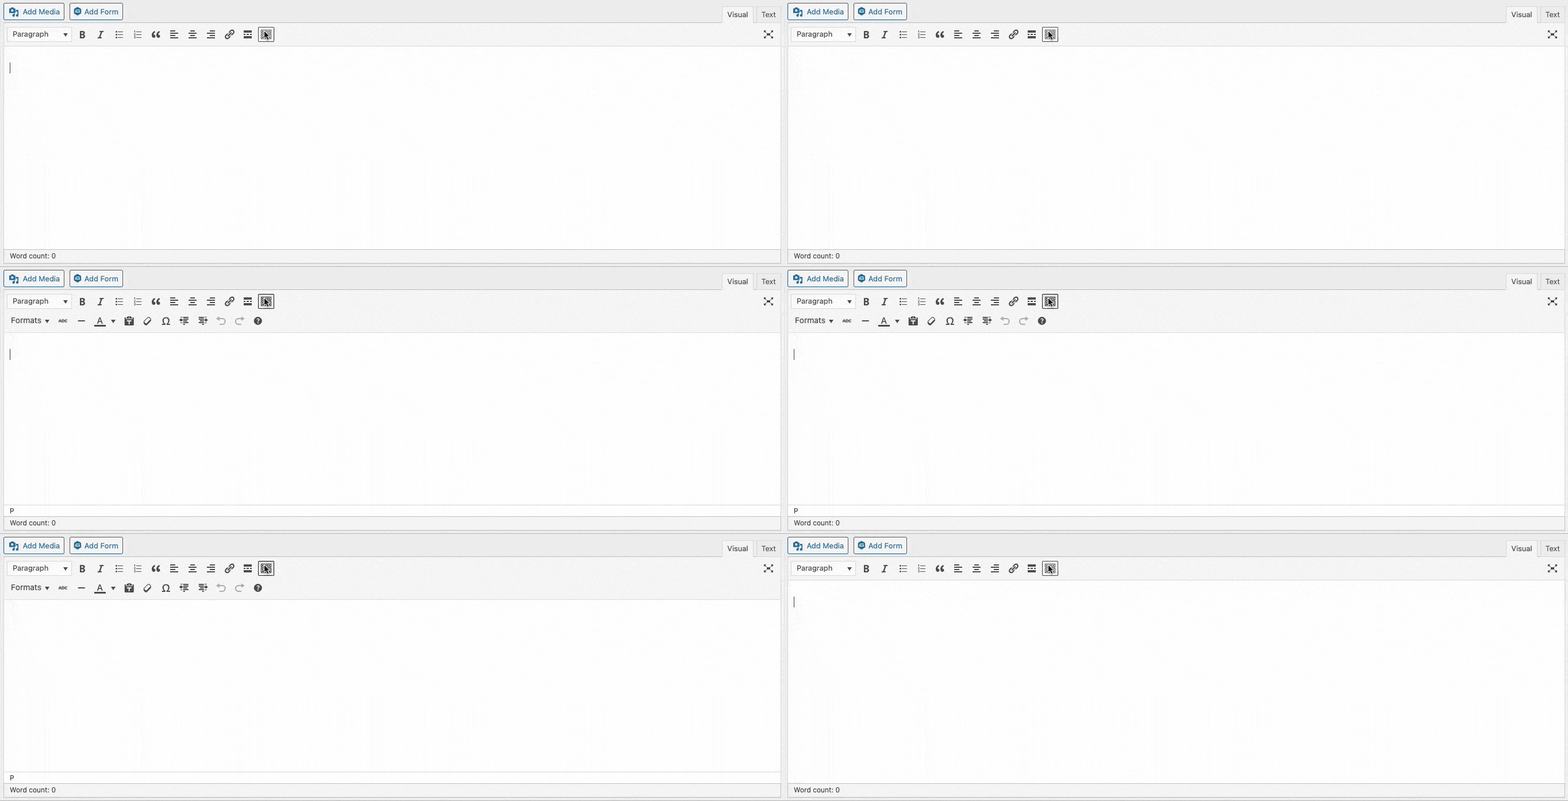
The typical formatting options – bold, italics, sizing, lists, etc. – are similar to what you’d see in Office, which can be comforting for new WordPress users. They’re all displayed in one row above the editor.
But the second row of formatting options, including indentation, text color, strikethrough and more, isn’t displayed automatically. In order to see it, you need to click the last button of the first row – the “Toolbar Toggle” button.
Speaking of text formats, if you’d like to see what the HTML view of your content looks like, click the “Text” tab – right next to the “Visual” tab – to see your content with all of its HTML formatting.
Screen Options: Click to Show Author, Excerpt, and More
On the typical WordPress editor page, there are a lot of boxes – categories, tags, featured image, publishing, and the editor itself. Not to mention any additional boxes plugins may have added, like for caching, SEO or custom fields.
The developers of WordPress have worked hard to simplify the experience, so a number of fields are hidden by default on the editor page. These include the author, custom excerpt, slug, discussion options, and more.
It can certainly be confusing when you’re looking to create a custom excerpt for your page or post … and the mysterious Excerpt field simply doesn’t seem to exist.
Alas — to ensure that you’re seeing all the fields you need to edit (and hide the ones you don’t), simply click the “Screen Options” tab at the top right of the page. It’ll drop down a section where you can control which Screen Elements appear and which don’t, including the traditional fields as well as ones added by plugins.
In addition to the fields that can be toggled, you can also choose to use a 1 or 2 column layout, and enable/disable the full-height editor, which increases the size of the editor for easier content creation.
Timezone: Change in Site Settings
It’s important to set an accurate timezone for your website, even if you have visitors coming from all over the world.
The wrong timezone can affect when your scheduled content goes live, or whether or not your events are considering upcoming or passed.
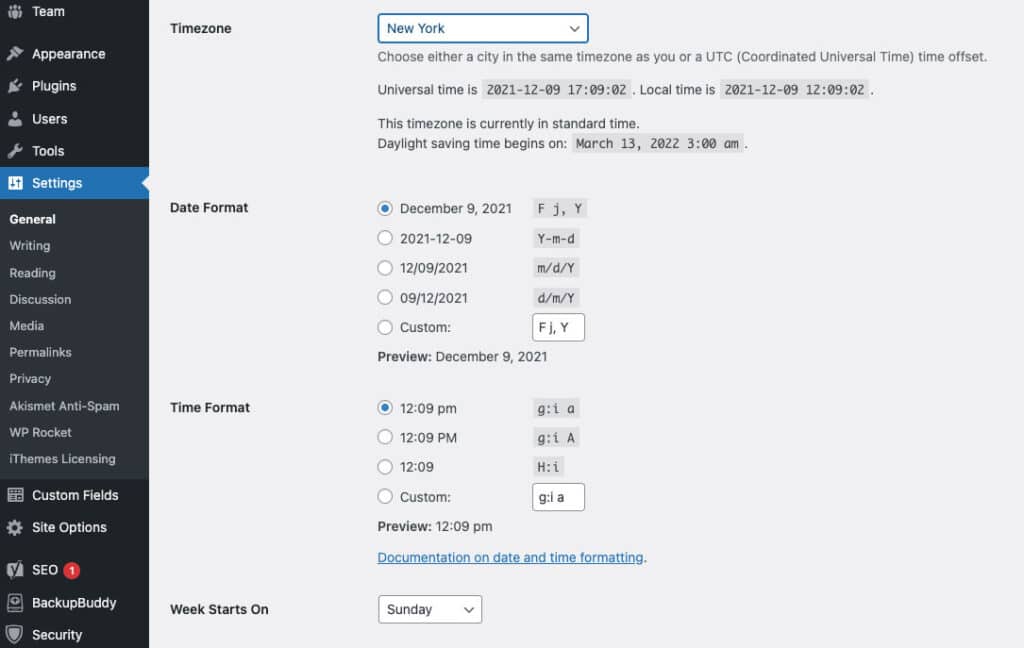
To set your timezone, click on Settings -> General, and then scroll to about half-way through the page.
Always set the timezone to your main location, and while you have the option to choose to base your timezone using a UTC offset, selecting a city means you don’t have to worry about making Daylight Savings Time adjustments twice a year.
While you’re on this page, you likely also want to set the “Week Starts On” field to be Sunday, rather than Monday, assuming you’re in a location where Sunday officially starts the week.


