WordPress Menus: 3 Hacks for a Better User Experience
Usability studies have (for years) shown that your website’s menu is where your users go first in order to find what they’re looking for.
This is why we’ve always advocated for clear labels, mobile accessibility, and sticky menus as must-haves for your website navigation.
Don’t make it difficult for your users to find what they need.
WordPress menus come with plenty of functionality and ways to improve user experience – if you know what to look for.
Here are 3 menu hacks for your WordPress website.
Open Menu Links in a New Tab
Whether or not your links should open a new tab or browser for your user has always been a point of contention; many marketing executives love it because it “keeps people on your site”, while most usability studies say no, you should not open new tabs for your user.
We won’t settle that debate here.
If you want links in your menu to open up in a new tab, then it’s simply a matter of checking a couple of boxes to make it happen.
When you’re editing your site’s menu (using the Appearance -> Menus link), the first thing you need to do is open the Screen Options:

(Screen Options is one of the WordPress settings everyone is always looking for.)
Check the “Link Target” checkbox, which will add a new option to your menu links:
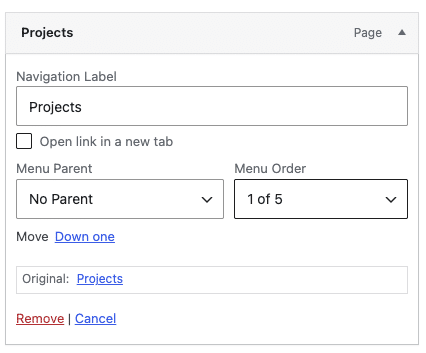
If you want your menu link to open in a new tab, check the “Open link in a new tab” checkbox and target="_blank" will be added to your menu item, telling the browser to open the link in a new tab or window.
Just as a reminder – if you’re going to have links open in new tabs, we would absolutely recommend making it visually clear to your user by adding an icon, like this one, next to the text.
Custom CSS Classes for Your Menu Links
There are some times when you need a menu link to look slightly different than all of the other links.
It could be a call-to-action, like a donate or register button, or a variation on your brand that requires something just a little different. Whatever the case, you may find yourself needing to style one of your menu links differently than all of the others.
In order to do that, it’s best to add a custom CSS class to that menu link so you can add your styles as necessary.
To use the custom CSS classes, go back to the Screen Options and make sure that “CSS Classes” under “Show advanced menu properties” is checked. Once you do that, your menu items will get a new field where the CSS classes can be added:

That CSS Classes field can support multiple classes (separated by a space), so if necessary, you can use more than one.
Most WordPress Menu Walkers will add the class here to the list item <li> for the link, rather than on the <a> link itself, so as you’re styling this CSS class, be sure to declare it correctly.
Hide and Show Menu Links Depending on User’s Logged in Status
This is a fun one, and requires a little bit more than checking a box in Screen Options.
If you’re running a community or membership site, then you likely have some menu links that you want to show or hide depending on whether or not a user is logged in. For example, you don’t want to show a “Log in” link to a user who is already logged in; and you wouldn’t show a “Log out” link to a user who’s already logged out.
In order to make this happen, we’re going to use Advanced Custom Fields to create a custom option for each menu item. Let’s call our group “Menu Visibility”, make a select dropdown called “Visibility”, and give it three options:
- All
- Hide for Logged Out
- Hide for Logged In
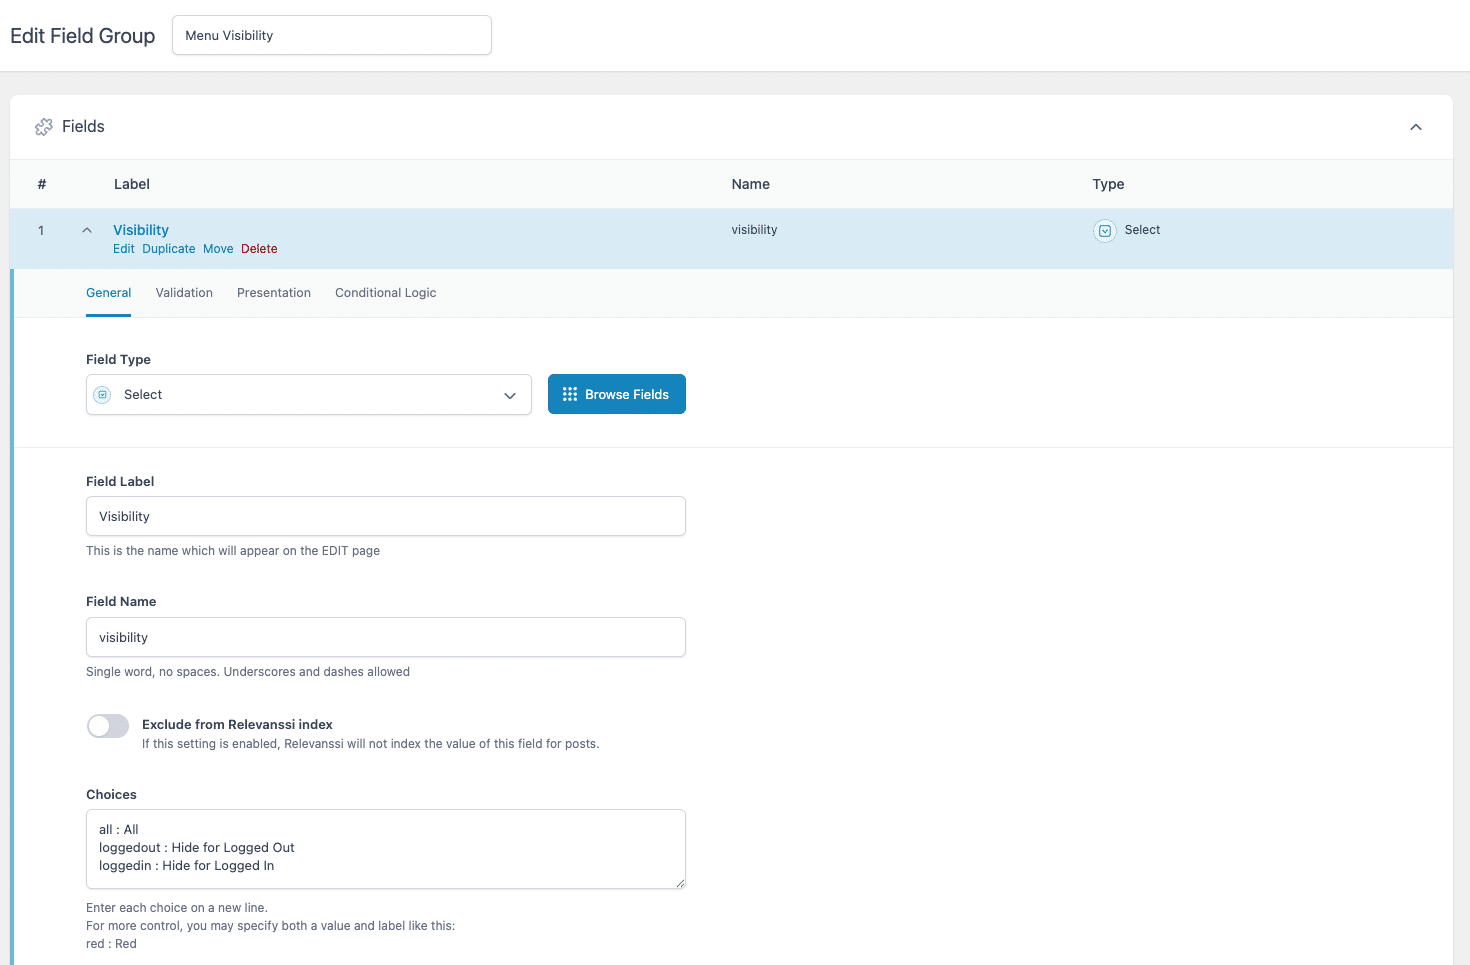
We want this field to show on Menu Items in our Utility Menu (in this case, since that’s where our Log in / Log Out links are).

After saving, we now have a new option to select visibility for our menu links in our Utility Menu. Links will default to always be visible, and you can select whether to hide it for logged out or logged in users:
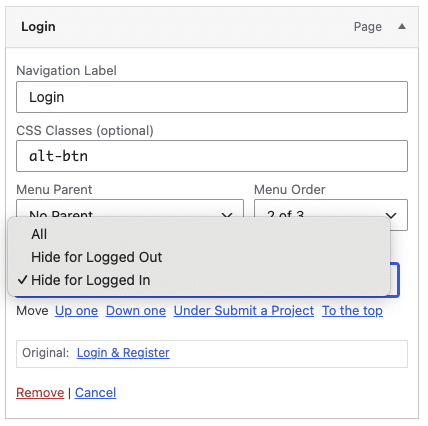
Now, there’s just one more step to making this work – the function that translates the selection into reality. Add this code to your functions.php file:
add_filter('wp_nav_menu_objects', 'dgtlnk_conditional_menu_items', 10, 2);
function dgtlnk_conditional_menu_items($items, $args) {
     foreach ($items as $key => $item) {
          $visibility = get_field('visibility', $item);
          if ($visibility == 'loggedin' && is_user_logged_in()) {
               unset($items[$key]);
          }
          if ($visibility == 'loggedout' && !is_user_logged_in()) {
               unset($items[$key]);
          }
     }
return $items;
This function loops through your menu items, looks for the “visibility” custom field, checks to see if its value is either ‘loggedin’ or ‘loggedout’, and updates its visibility accordingly. It’s a fun little hack that gives you menu control without having to install another plugin just to do this.
Have questions about making your WordPress menus better? Reach out – we’re happy to help.