Setting Height and Width Restrictions on WordPress Featured Images
In WordPress, most post types – whether they are Pages, Posts, or a Custom Post Type – allow you to add a Featured Image. The Featured Image often appears at the top of the content, as a thumbnail on a blog landing page, or as a preview when the content is shared on social media.
While WordPress provides ways to add custom image sizes to your site, it’s hard to add any restrictions to the default Featured Image field. For example, you may want to make sure that Featured Images are always at least 1000px wide. Unfortunately, there’s not a built-in way to do that, so users may accidentally upload images smaller than necessary for the design, which would display incorrectly on the site.
You can, however, add height and width restrictions to the built-in WordPress Featured Images using one of our favorite plugins: Advanced Custom Fields (ACF).
Here’s how.
Using an ACF Image Field as the Featured Image
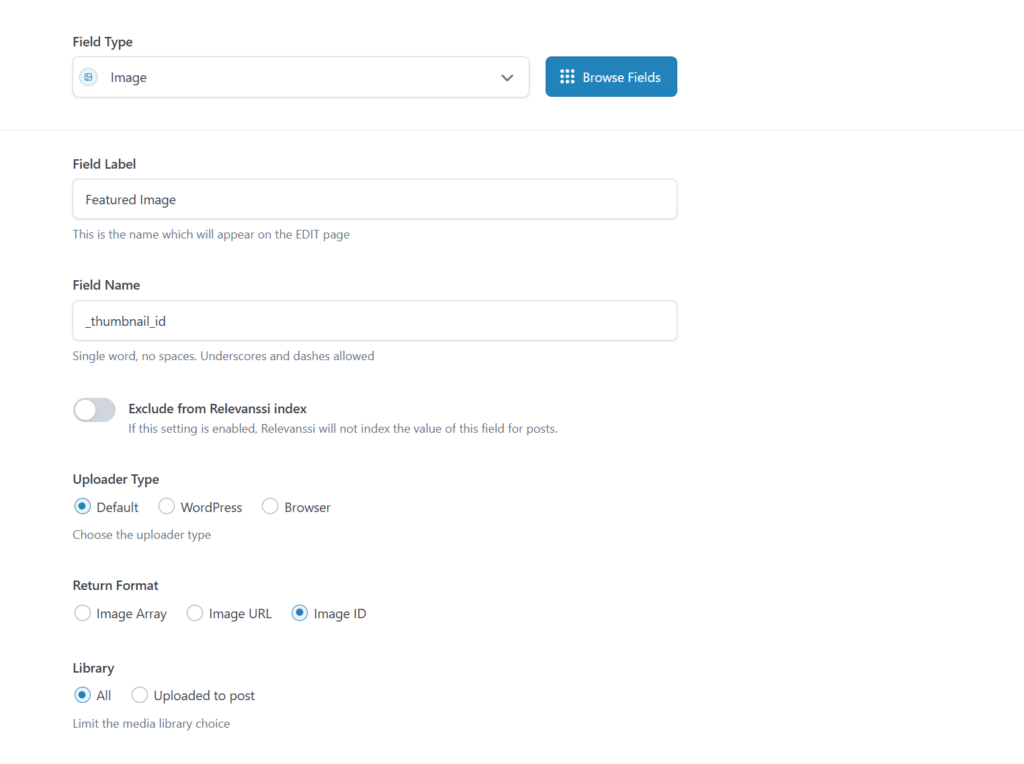
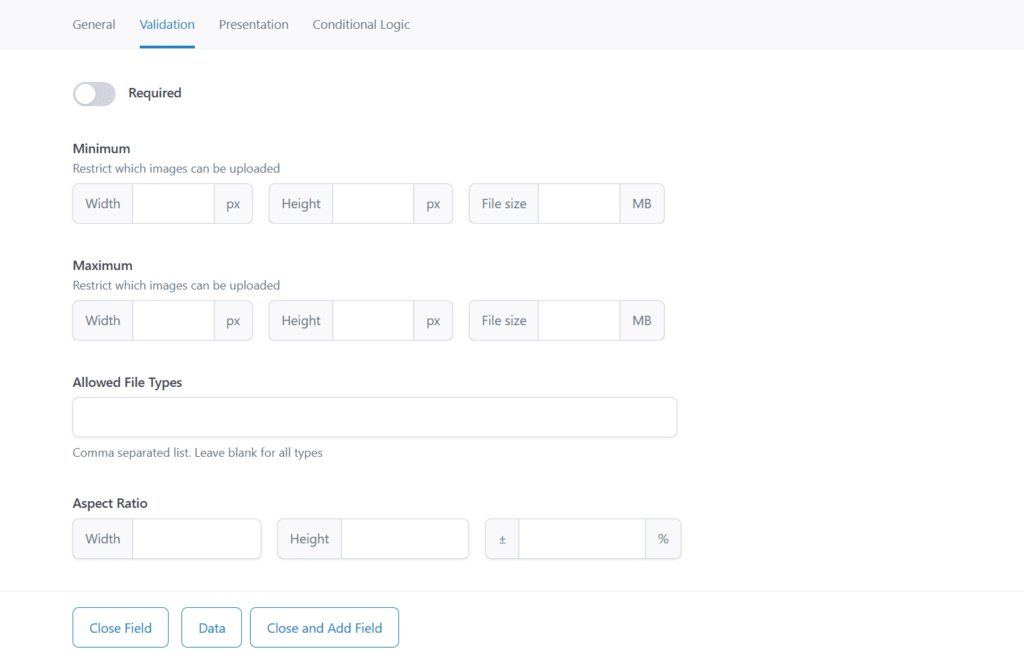
ACF comes with its own image field, which allows you to set a minimum and maximum width and height, along with file size and file type restrictions.
In order to use the ACF image field as a featured image for any given post or page, you must add it to your page or post type, set the field name value for the image to “_thumbnail_id” and set the return format to “Image ID”. This will tell ACF to update the built-in Featured Image with your new ACF image field.
And that’s it! It’s relatively simple, and works great if you want your users to only be able to choose Featured Images that have a width and height in the range you set.
Adding Aspect Ratio Requirements to Featured Images
Here’s the next step. What if we want to make sure the only images that can be selected are ones with a specific aspect ratio?
This can be achieved by utilizing ACF’s render_field_validation_settings and validate_attachment filters.
The ACF render_field_validation_settings filter is used to add custom settings to a given field, and the validate_attachment filter is used to perform custom validations on an attachment.
Add this code to your functions.php file:
add_filter('acf/render_field_validation_settings/type=image', 'dgtlnk_image_aspect_ratio_settings', 20);
function dgtlnk_image_aspect_ratio_settings($field) {
     $args = array(
          'name' => 'ratio_width',
          'type' => 'number',
          'label' => __('Aspect Ratio'),
          'default_value' => 0,
          'min' => 0,
          'step' => 1,
          'prepend' => __('Width'),
     );
     acf_render_field_setting($field, $args);

     $args = array(
          'name' => 'ratio_height',
          'type' => 'number',
          'label' => '',
          'default_value' => 0,
          'min' => 0,
          'step' => 1,
          'prepend' => __('Height'),
          'wrapper' => array(
               'data-append' => 'ratio_width',
               'width' => '',
               'class' => '',
               'id' => ''
          )
     );
     acf_render_field_setting($field, $args);

     $args = array(
          'name' => 'ratio_margin',
          'type' => 'number',
          'label' => '',
          'default_value' => 0,
          'min' => 0,
          'step' => .5,
          'prepend' => __('±'),
          'append' => __('%'),
          'wrapper' => array(
               'data-append' => 'ratio_width',
               'width' => '',
               'class' => '',
               'id' => ''
          )
     );
     acf_render_field_setting($field, $args);
}
We append “type=image” to the render_field_validation_settings filter so that the custom settings only display in the validation tab of an image field and add a ratio width, ratio height, and a ratio margin number field.
Once the custom settings are added, we utilize the acf/validate_attachment/type=image filter to add validation code that will disable images in the media library if they do not meet the aspect ratio added under settings.
add_filter('acf/validate_attachment/type=image', 'dgtlnk_image_aspect_ratio_validate', 20, 4);
function dgtlnk_image_aspect_ratio_validate($errors, $file, $attachment, $field) {
if (empty($field['ratio_width']) || empty($field['ratio_height']) || empty($file['width']) || empty($file['height'])) {
return $errors;
}
$ratio_width = intval($field['ratio_width']);
$ratio_height = intval($field['ratio_height']);
if (!$ratio_width || !$ratio_height) {
return $errors;
}
$width = intval($file['width']);
$height = intval($file['height']);
$allowed_height = $width/$ratio_width*$ratio_height;
$margin = 0;
if (!empty($field['ratio_margin'])) {
$margin = floatval($field['ratio_margin']);
}
$margin = $margin/100;
$min = round($allowed_height - ($allowed_height*$margin));
$max = round($allowed_height + ($allowed_height*$margin));
if ($height < $min || $height > $max) {
$errors['aspect_ratio'] = __('Image does not meet Aspect Ratio Requirements of ') . $ratio_width . __(':') . $ratio_height . __('±') . $ratio_margin . __('%');
}
return $errors;
}Inside the callback function, we first check to make sure everything has a value that is a number greater than 0. Then, we perform some simple match to calculate the maximum height for the image based on its width. We also calculate the margin (if one is provided) and calculate the minimum and maximum height for the image. If an image that does not meet the aspect ratio requirements is selected, we create an error message and return it.
This gives us full control over the type and size of image that can be assigned to a post/page and prevents images from not displaying correctly on the front-end.
If you would also like to add restrictions on your WordPress featured image or for any other digital marketing needs, reach out to us and will be more than happy to assist.

